Last updated: July 23, 2023 at 5:31 PM
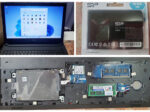
By changing the registry on a second-hand PC (Dell OptiPlex 7020 SFF) that does not support Windows 11, the system requirements [CPU/UEFI/Secure boot/TPM 2.0] were avoided, and Windows 11 was newly installed successfully.
As for this PC, after having two old desktop PCs installed with Windows XP and Windows 7 installed at home free of charge at a recycling company*, I purchased a second-hand PC with relatively high performance. I found a good and cheap desktop computer on Yahoo auction and bought it.
* Lynette Japan

The specs of the used PC I purchased are as follows.
《 Specs of used PCs 》
Dell OptiPlex 7020 SFF (Small Form Factor)
[CPU] Intel Core i5 4590 (3.3GHz up to 3.7GHz operation)
【GPU】 Radeon R7 250 (2GB VRAM capacity)
[Memory] 8GB (4GBx 2-piece configuration)
【SSD】 SSD 240GB (New)
【Optical Drive】 DVD-ROM Drive
【Wired LAN】 Gigabit LAN(10/100/1000Mbps)
【OS】 Windows 10 Pro 64bit (installed)
In addition to the new SSD, the GPU board (Dell Radeon R7 250) is also installed, so Windows 10 starts at an explosive speed. The GPU isn't top class by any means, but I think it's enough specs.
As a purpose, we are thinking of using it for photo retouching software such as Photoshop and Go AI software.
Although it is an old model, the purchase price was only 13,800 yen, so I think that it was a very good shopping.
By the way, Windows 10 works so comfortably that I want to run this PC on Windows 11! The desire has boiled. So this time, I decided to try upgrading to Windows 11.
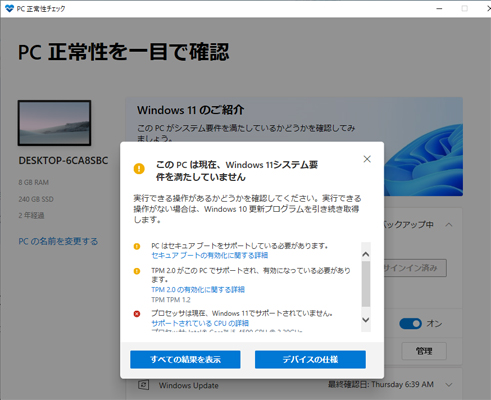
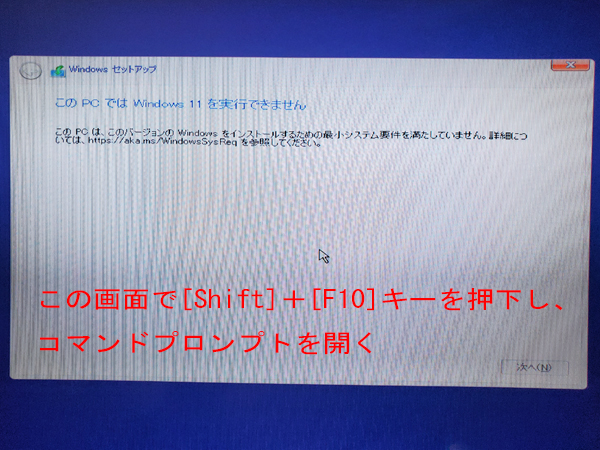
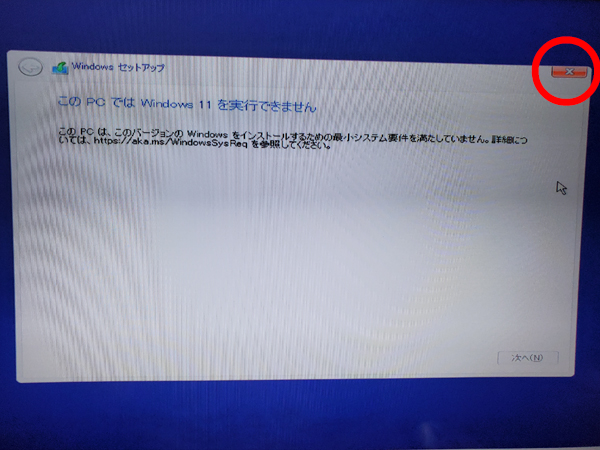
However, as you can see in the screen below, this PC does not meet the system requirements for Windows 11 in the Windows PC Health Check, so Windows 11 cannot be installed in the usual way.
By the way, the system requirements for Windows 11 are summarized as follows:
《 System Requirements for Windows 11 》
・Intel: 8th generation Core or later CPU
AMD: Ryzen 2000 series or later CPUs
UEFI compatible
Secure boot support
TPM: TPM 2.0
Graphics Card: DirectX 12 or higher supported
The CPU of this machine is Core i5 4590, so it corresponds to the 4th generation CPU. Also, even if TPM is turned on in BIOS settings, it is an old version 1.2 (Dell does not support updating to TPM2.0), and if BIOS mode is set to UEFI/Secure boot (boot mode is legacy If you switch from UEFI to UEFI, you must reinstall the OS), it seems that the PC side does not support it, and booting with UEFI did not go well.
After various investigations, it is a tricky method, but apparently the method described in the following article * is smart, and it seems to be the best.
* How to install Windows 11 on an unsupported PC [Registry Edition]

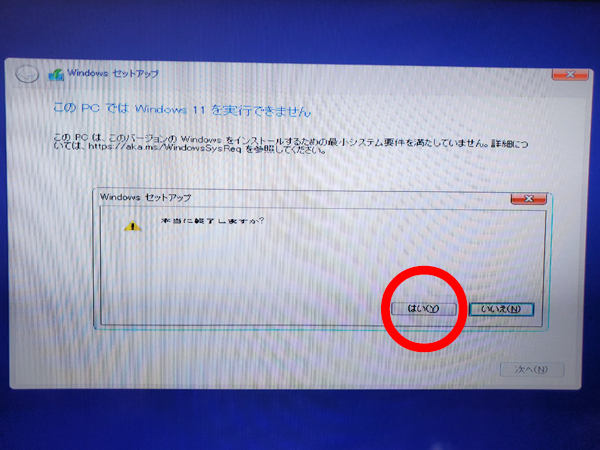
This avoids system requirements by modifying the registry during installation and means a fresh installation of Windows 11.
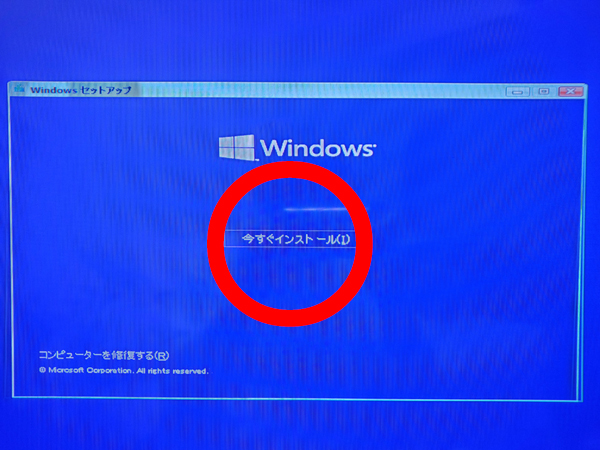
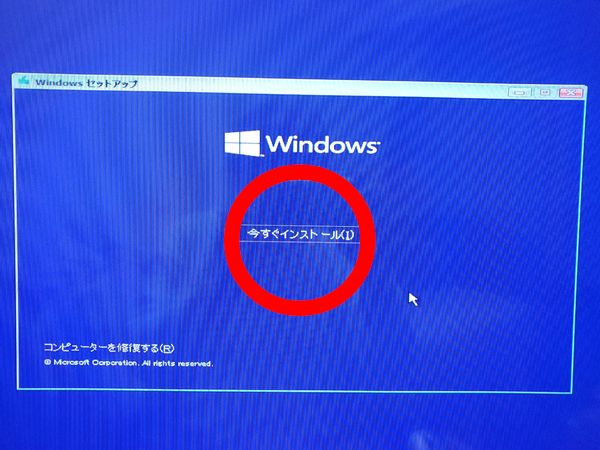
So this is how you try to install Windows 11.
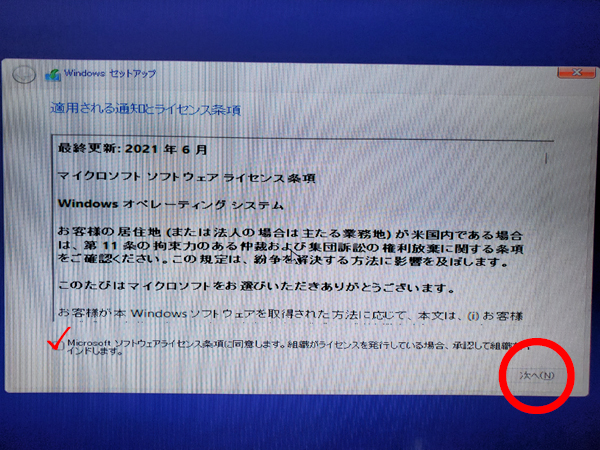
About a new installation of Windows 11
Before installation, prepare the following:
Check and hold back the product key for activation
This will be used for later Windows 11 activation.
My PC seems to have been Windows 8.1 when the manufacturer was sold, but I know that the product key used in this OS is also available for Windows 11.
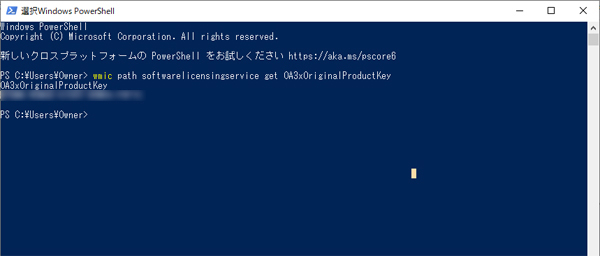
If there is no description of the product key, such as purchasing a used PC, you can check with the following command (in the case of power shell).
wmic path softwarelicensingservice get OA3xOriginalProductKeyBy the way, if you take over your Microsoft account during installation, it will be activated automatically in connection with your account, so you don't need to enter your product key in particular.
2022.05.09 Addendum
Dell PCs with factory installed Windows 8 or Windows 10 have a product key on the motherboard (BIOS). In that case, "It is activated by a digital license" is displayed, and it seems to be activated without entering a license key.
USB memory available
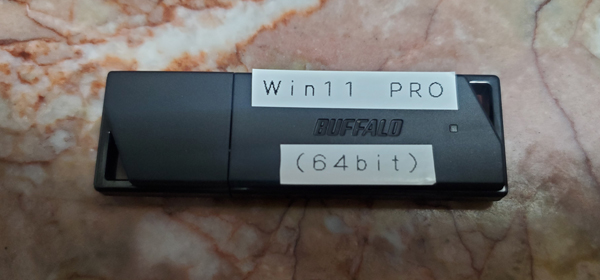
Prepare a USB memory (8GB or more) to create a Windows 11 USB media drive.
Download and run "MediaCreationToolW11.exe" from the following link to create media for installing Windows 11.

A DVD can also be used as the media drive, but considering the time and effort required to create the media drive, as well as the saving process and processing speed of the registry editor's batch file, I think USB media is much easier to handle. increase.
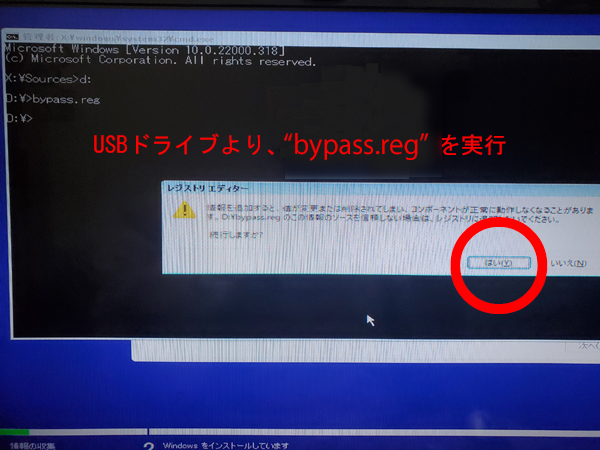
After creating the USB media for installing Windows 11, create a batch file "bypass.reg" for changing the registry as follows and transfer it to the USB media.
Windows Registry Editor Version 5.00
[HKEY_LOCAL_MACHINE\SYSTEM\Setup\LabConfig]
"BypassTPMCheck"=dword:00000001
"BypassSecureBootCheck"=dword:00000001
"BypassRAMCheck"=dword:00000001
"BypassStorageCheck"=dword:00000001
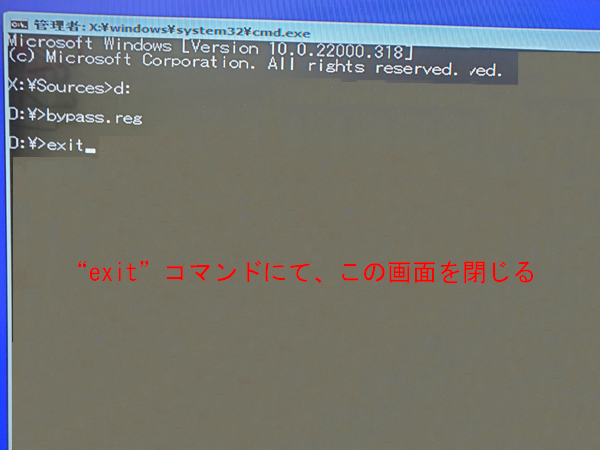
"BypassCPUCheck"=dword:00000001Booting from a USB storage device
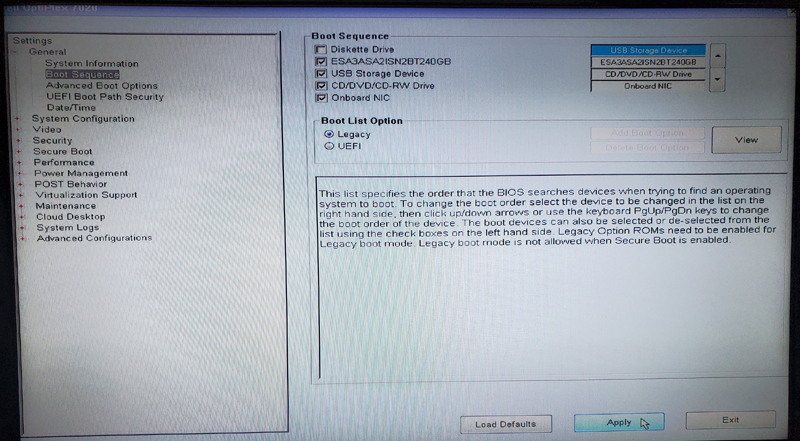
Insert the USB media of Windows 11 into the USB slot, turn on the power of the PC, and repeatedly hit the F2 key at startup to open the BIOS setting screen.
In the BIOS settings, change the USB storage device to the highest priority in the Boot sequence settings and restart the PC to start installing Windows 11.
Preparation is above, but this will be a clean installation, so all the data and apps created so far will be deleted, so do not forget to back up the data before installation.
In addition, if you carry out what is written here, as described in the following article, there is a risk that Windows update will not be possible in the future, so please do so at your own risk to the last

Also, as the following article says, PCs that do not meet the system requirements of Windows 11 seem to experience a higher rate of hardware crashes.
As a matter of fact, when I transferred a large number of files from the USB memory to the SSD on my PC, a system error (memory shortage error despite the fact that there was enough memory) occurred several times, so be careful. Is required.
Therefore, we recommend that you avoid installing Windows 11 on a PC that does not meet the system requirements, and limit it to hobby PCs, etc.

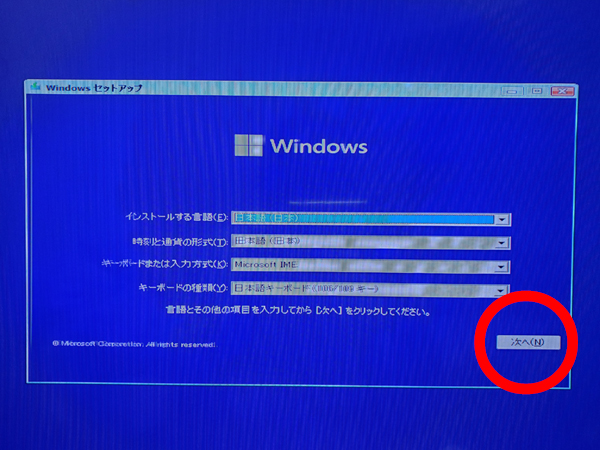
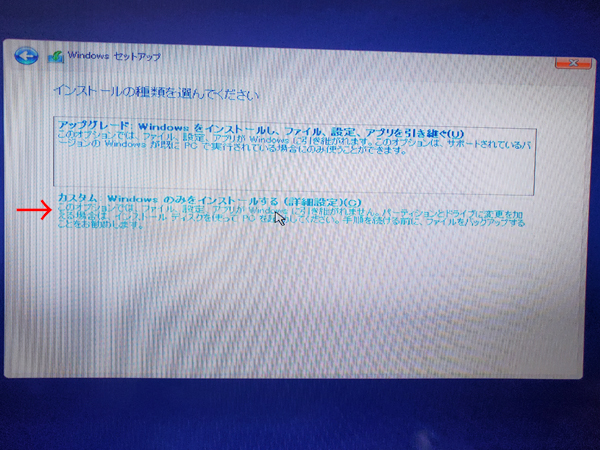
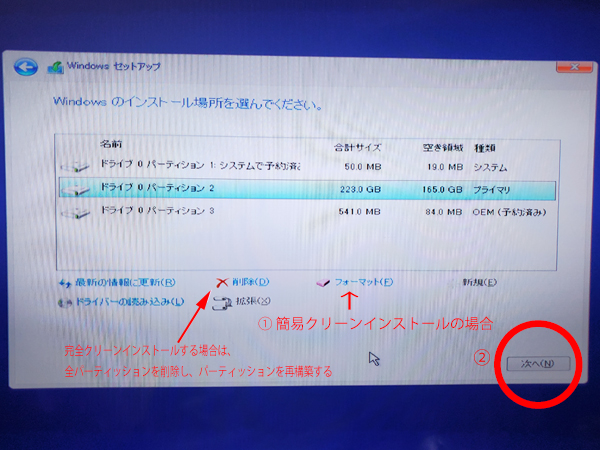
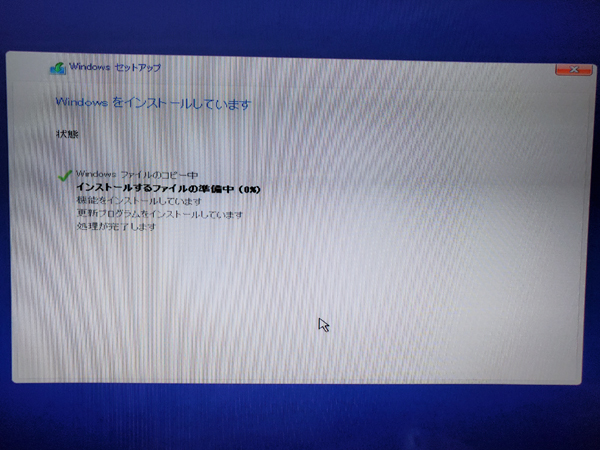
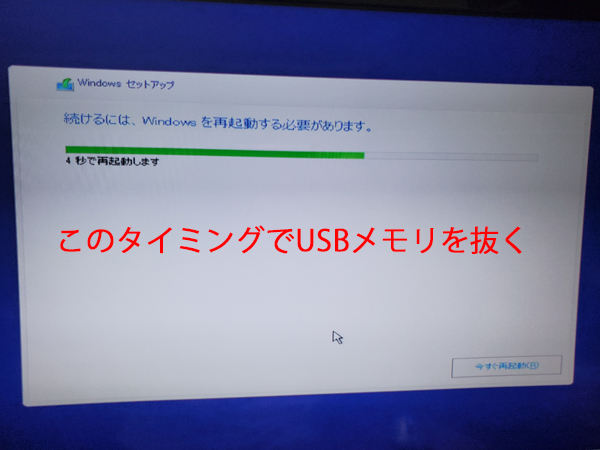
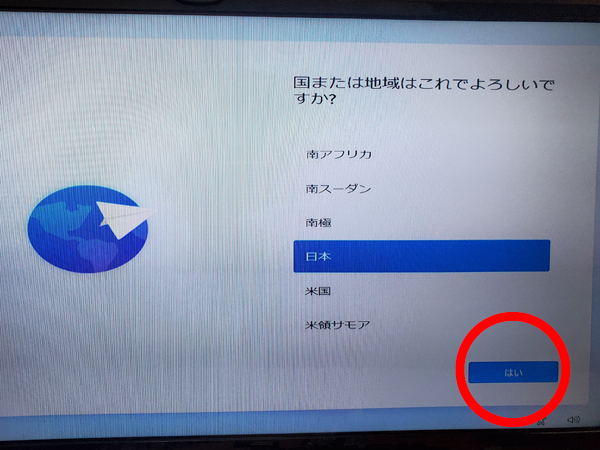
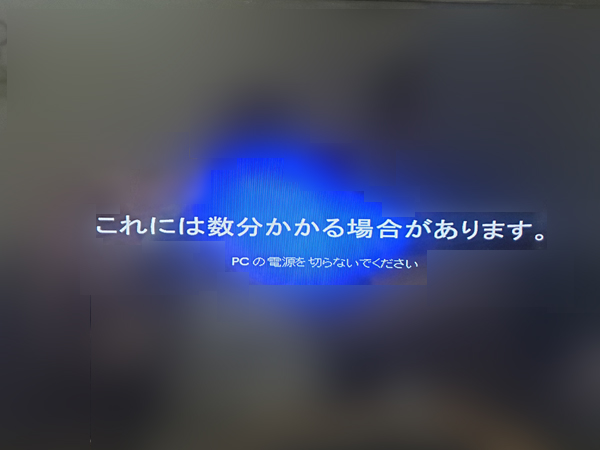
New installation instructions for Windows 11 Pro 64bit
In the linked article, I think that the procedure for installing Windows 11 is a little difficult to understand, so I will post the detailed operation procedure when actually creating a USB media of Windows 11 Pro 64bit and installing it in the gallery below.
2022.05.12 Addendum
If you are using a DELL laptop, the [Shift]+[F10] key does not work in the following procedure. In that case, press [Fn] + [Esc] and then follow the steps below.
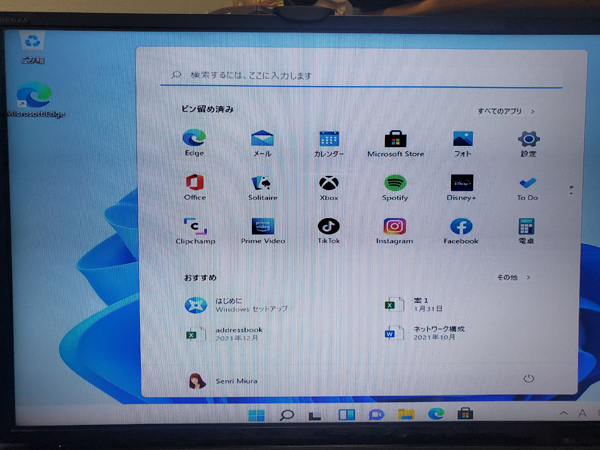
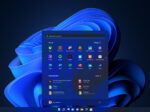
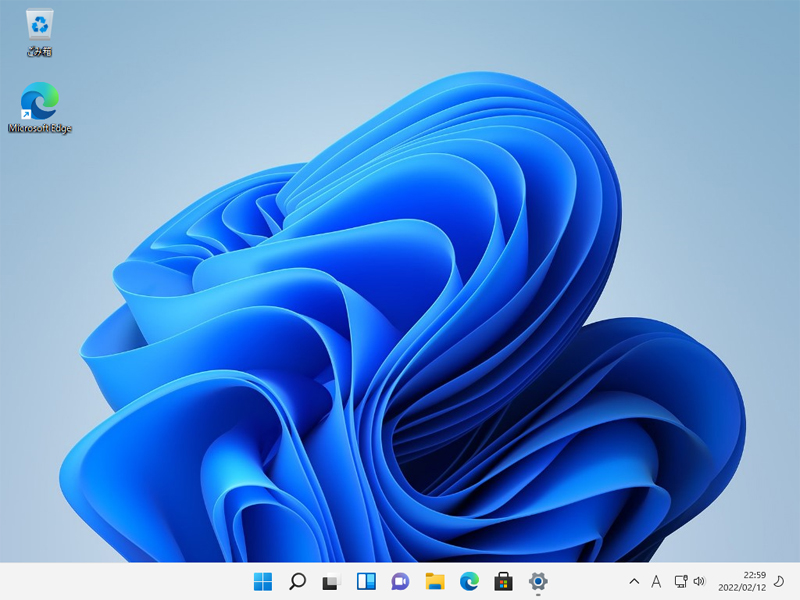
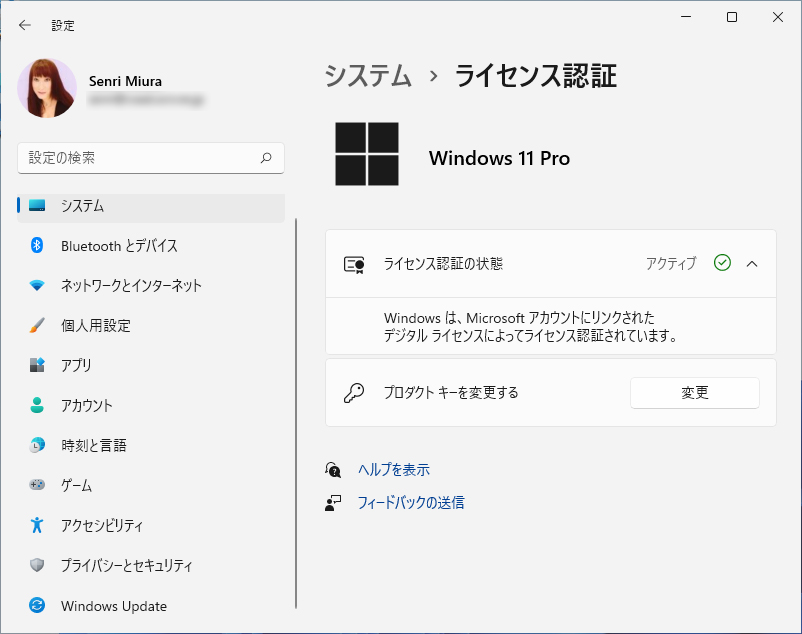
The installation of Windows 11 was successful as follows, and activation passed!
It was happy. (^^♪
In addition, since a simple clean installation was performed this time, partition 3 (OEM) of drive 0, which is a hidden partition created by DELL, is left.
However, this partition is not required because there is a Windows 11 backup.
So after installation, you can also remove this OEM partition with Diskpart and extend the space of drive C.
Drive C can be expanded from The Windows Management Tool's Computer Management → Disk Management.
For more information about OEM partition deletion, please refer to the article below.

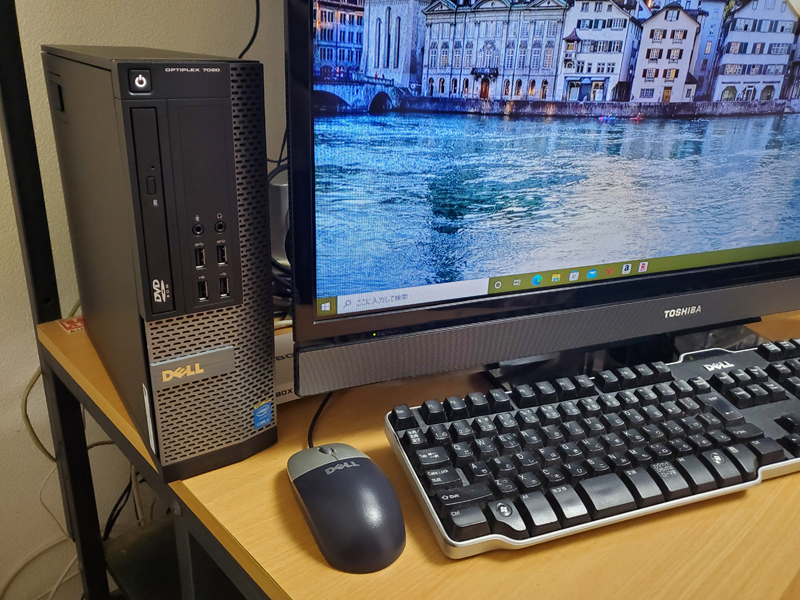
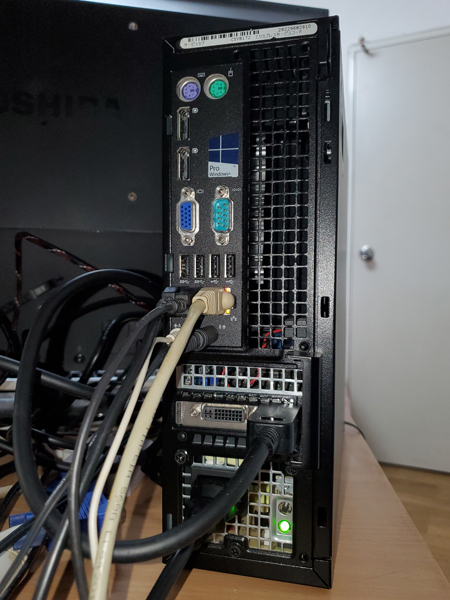
About system configuration
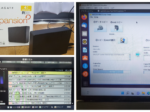
The system configuration of a desktop computer (Dell OptiPlex 7020 SFF) with Windows 11 installed is as follows:
Connecting to Toshiba Regza 32S5
I threw away the Dell analog monitor that I had used before with a VGA connection, and this time I used a Toshiba TV Regza 32S5 as a PC monitor.
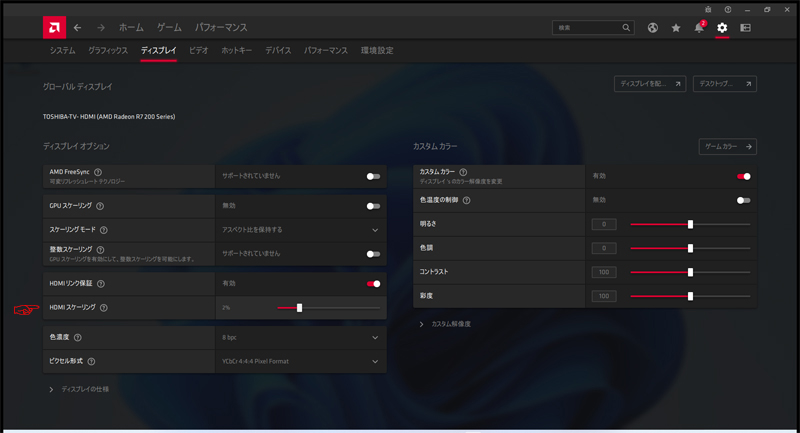
Since the model did not have an HDMI terminal, I connected it with the following display port HDMI conversion cable from the DisplayPort connector of Radeon R7.
Amazon.com: Displayport to HDMI Converter Cable
In Windows settings, set the display resolution setting to 1366x768 to match the Regza 325S resolution.
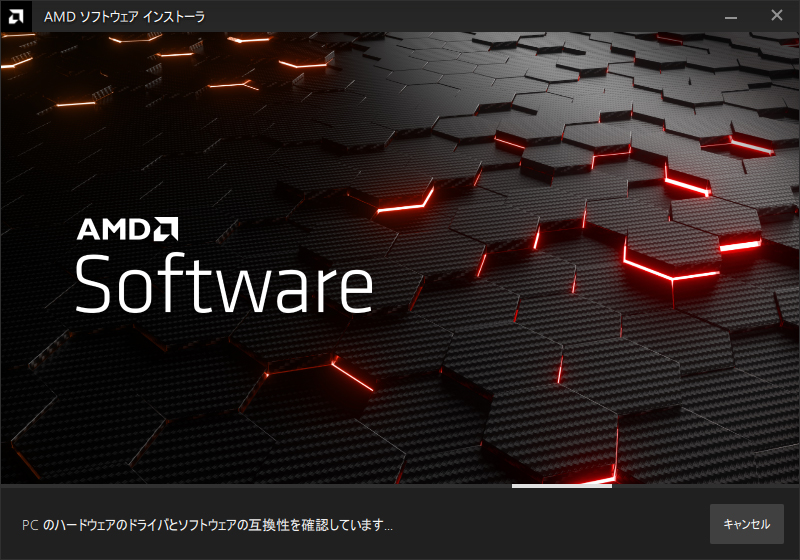
Note that a clean installation of Windows 11 does not install the Radeon video driver (Radeon R7 250) and must be installed separately.
Also, since HDMI connection to TV causes the edge of the screen to be cut off, install the latest Radeon driver as follows, open the display setting screen, and adjust by changing the HDMI scaling. .
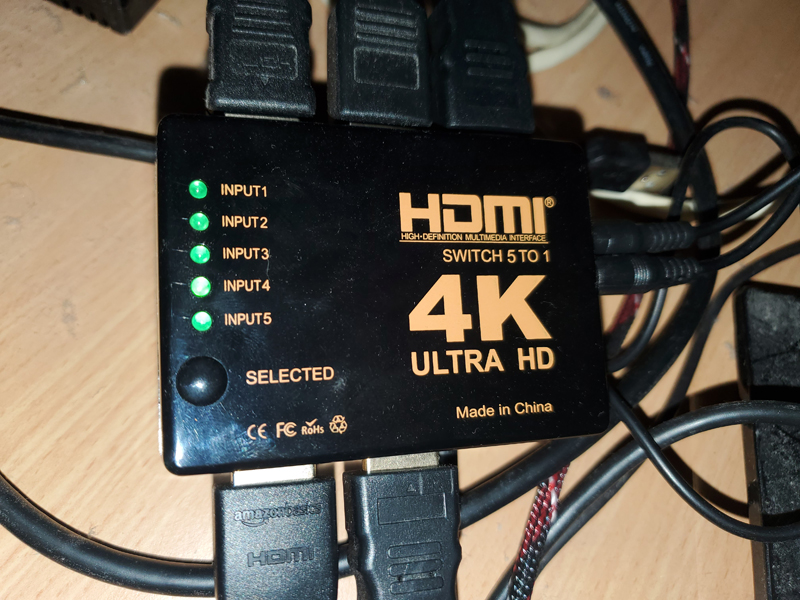
Installing hdmi selectors
Connected to Regza via HDMI selector (4K/5 input 1 output) with remote control and satellite.
2023.07.23 update
This article is the procedure for installing the version of Windows 11 (21H2) on a model that does not support Win 11.
Please note that it does not support Windows 11 (22H2).
Regarding the installation of Windows 11 (22H2) on non-Win11 compatible models, we recommend the tool "Rufus" introduced in the following article from now on.